
Views: 0 Author: Site Editor Publish Time: 2026-10-13 Origin: Site


A common and incredibly frustrating scenario for landscaping professionals is discovering inconsistent watering patterns. You might wake up to find your prized tomato plants wilting. The watering timer ran faithfully every morning. So what went wrong? Often, the root cause is not a faulty pump or a sudden drop in water pressure. Instead, microscopic debris is blocking the delicate pathways of your system.
The most practical solution to this widespread problem is an inline filter. This essential component acts as the unsung hero of any efficient watering setup. Purchasing the purification device is only the first step. Knowing exactly where to install it within your plumbing sequence dictates whether your system will function optimally for years or fail prematurely under pressure. Let us break down the mechanical realities of proper installation.
Understanding the mechanical vulnerabilities of a modern watering system helps clarify why proactive filtration is a structural necessity rather than an optional upgrade. Water sources carry microscopic particulates. These pose a severe, ongoing threat to low-flow watering equipment. I have seen countless setups fail simply because property owners assumed municipal water was clean enough for their plants.
Drip emitters and micro-sprinklers release water at an incredibly slow pace. To achieve this precise flow, the internal orifices are remarkably small. They are highly susceptible to blockages. Even treated municipal water introduces rust flakes and calcium scale from aging underground pipes. For properties utilizing well water, organic matter like algae and fine silt are constant threats. Integrating a high-quality irrigation water filter acts as a reliable physical barrier. It traps these microscopic contaminants before they can travel down the poly tubing and permanently choke off the water supply.
Beyond protecting the emitters at the end of the line, a robust sediment trap serves as a primary defense mechanism for the more expensive downstream components. Automated solenoid valves and pressure regulators rely on sensitive internal rubber diaphragms and tiny metal springs to function correctly. When grit enters a pressure regulator, it easily lodges in the spring mechanism. The regulator fails in the open position. This mechanical failure allows high-pressure municipal water to blast directly into your fragile drip tubing. The result is blown-off emitters and localized flooding. Capturing abrasive debris early preserves the structural integrity of your entire landscape infrastructure.
The most common point of failure for landscapers is assembling the components in the wrong order. Incorrect sequencing defies basic fluid dynamics. It inevitably leads to cracked housings and constant leaks. For a standard above-ground residential setup connecting directly to an exterior wall, the components must be attached in a highly specific sequence.
First, the Water Source Spigot provides the raw water supply. Next, the Backflow Preventer stops contaminated garden water from siphoning back into your clean drinking water. Following that, the Water Timer automates the watering schedule. Then comes the Inline Filter to remove physical debris from the active water stream. After that, the Pressure Regulator reduces high municipal water pressure to a safe operating level for micro-irrigation. Finally, the Drip Tubing Adapter connects the rigid brass and plastic hardware to the flexible distribution tubing.
The filtration unit should always be installed after the water timer. Standard electronic water timers are constructed with heavy-duty internal valves designed to withstand constant static water pressure from the city supply. Standard plastic irrigation filters are engineered to handle dynamic pressure, meaning water that is actively flowing. If you mistakenly place the drip system filter before the timer, the plastic housing remains under continuous high pressure even when the system is off. This relentless stress causes the plastic housing to fatigue and fracture.
Furthermore, the filter must always be installed before the pressure regulator. Regulators contain tiny internal pathways that restrict incoming water force. If unfiltered raw water enters the regulator, sand and rust will jam these moving parts. Placing the filter first ensures only clean water enters the delicate pressure-reducing mechanisms.
The physical location of your hardware depends entirely on the scale of the irrigation system you are building. Both above-ground and underground setups have distinct spatial and structural requirements.
Above-ground installations attached directly to a garden spigot are incredibly popular for home gardeners due to their unmatched convenience. The components are easily visible. Making adjustments requires no digging. However, attaching a long sequence of brass and plastic parts creates a heavy cantilever effect on the spigot. When filled with water, this assembly can easily weigh several pounds. To prevent this heavy lever from snapping the copper pipe inside your wall, you must support the assembly. I always recommend using a Y-connector with a short leader hose to divert the heavy setup closer to the ground. You can also place a physical support block directly beneath the heavy pressure regulator to bear the downward load.
For larger multi-zone landscape systems, the components are typically housed permanently underground inside a protective plastic PVC valve box. The inline unit is plumbed directly into the PVC manifold. In this scenario, the filter must be placed immediately after the electronic zone valve. You must ensure there is adequate physical clearance inside the subterranean box. You will need a minimum of four to six inches of empty space below the housing. This allows you to comfortably unscrew the bottom cap and slide out the internal mesh screen for routine cleaning.
Proper installation goes beyond just knowing the correct order. It requires careful attention to thread types and flow direction. Follow these objective steps to ensure a watertight setup.
Gather your tools and components. You will need the filtration unit, the pressure regulator, the water timer, a roll of plumber tape, and a dry towel. Avoid using liquid pipe dope on plastic irrigation parts. The harsh chemicals in these pastes can degrade the plastic over time.
Shut off the main water supply. Site preservation and safety come first. Ensure the exterior spigot is completely turned off. If you are working on a larger underground manifold, locate and shut off the main irrigation isolation valve.
Check the flow direction arrows. This is a critical mechanical step that is frequently overlooked. Every inline housing features a prominently molded arrow on the outside of its plastic body. This arrow dictates the required direction of water flow. The arrow must point exactly away from the water source and push toward the garden beds.
Apply tape and connect the components. Inspect the threads closely. If you are connecting tapered National Pipe Thread fittings, wrap the male threads tightly with tape. Apply the tape in a clockwise direction using three overlapping wraps. If your components utilize straight Garden Hose Threads equipped with a thick rubber washer, tape is generally unnecessary. Adding tape to hose threads can actually interfere with the rubber seal and cause a leak. Carefully thread the housing onto the timer. Hand-tighten only. Using metal wrenches on plastic components almost always leads to overtightening.
Attach downstream components and test. Thread the pressure regulator onto the outflow side of the housing. Turn the spigot on very slowly. A sudden violent rush of high-pressure water can shock and damage the system. Inspect all connection points for subtle drips. If a leak occurs, simply turn off the water, adjust the internal rubber washer, and test it again.
As municipalities across the globe face increasingly stringent water conservation laws, the landscaping sector is experiencing a massive shift. We are moving away from traditional overhead sprinklers toward high-efficiency micro-irrigation. This transition makes precision water management non-negotiable. Modern smart irrigation controllers allow homeowners to automate watering schedules with pinpoint accuracy.
These advanced solenoid valves are highly sensitive to sediment. Recent field data reveals that a significant percentage of smart system failures are traced directly back to particulates jamming the micro-valves. Landscape architects now view robust inline filtration as a mandatory insurance policy for smart irrigation investments. This trend is driving a massive surge in the adoption of easily serviceable Y-screen setups across residential and commercial properties alike. Simply put, building a modern irrigation network without professional-grade filtration is a guaranteed path to system failure.
Selecting the correct hardware is just as vital as installing it in the proper sequence. Understanding the nuances in filtration technology ensures your system operates at peak efficiency. I have seen countless property owners buy the wrong mesh size, resulting in either constant clogging or blown emitters. When building a standard backyard drip setup, flow capacity and ease of maintenance are your primary considerations.
| Specification | Industry Standard Recommendation | Why It Matters for Your System |
|---|---|---|
| Filter Type | Y-Screen Filter | Allows for easy flushing without dismantling the entire plumbing manifold. Gravity pulls heavy debris away from the mesh. |
| Connection Size | 3/4-Inch Male Threads | Universally compatible with standard residential hose bibs, timers, and pressure regulators. |
| Mesh Rating | 120 Mesh | Perfectly optimized for micro-irrigation. Traps microscopic sand while maintaining optimal flow rates. |
| Material | Heavy-Duty UV Resistant Plastic | Prevents housing fractures under dynamic pressure and resists sun degradation. |
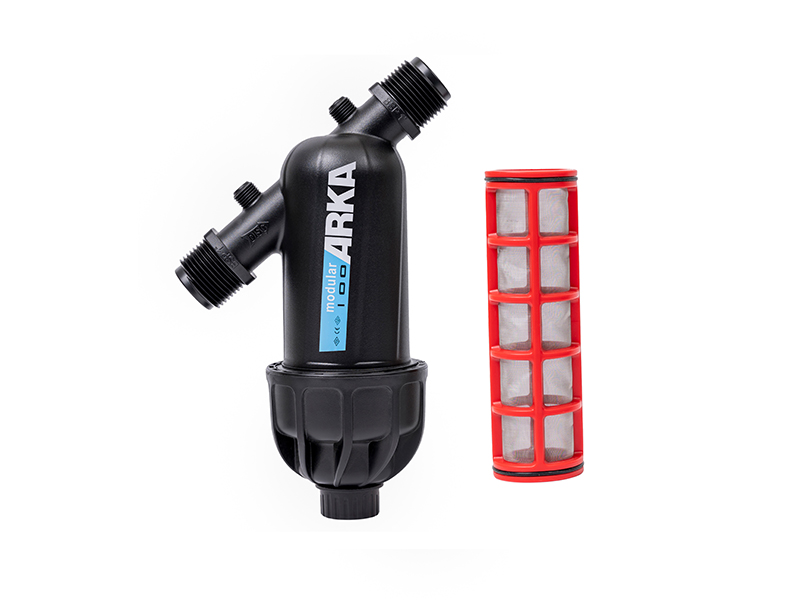
For reliable long-term performance, choosing a 3/4-Inch Y-Screen Filter for Irrigation Water Filtration is the industry standard. A Y-shaped body is engineered so the debris basin sits at a downward angle. This specific sizing ensures broad compatibility with standard timers and regulators. It provides excellent flow rates for typical garden zones. A 120-mesh screen is fine enough to trap the microscopic sand that clogs emitters but large enough to allow sufficient water flow to keep the entire system properly pressurized.
Even with premium hardware in hand, simple installation errors can severely compromise the entire watering system. Avoiding these documented pitfalls will save you immense frustration.
Ignoring the directional flow arrow is


